Rice Krispie Treats have been a staple in my kitchen for years, bringing instant smiles and a touch of nostalgia. There’s something so magical about that sweet, gooey, crispy goodness, especially when they’re transformed into fun Halloween Rice Krispie Treats! I remember making them with my mom as a kid, the smell of melted marshmallows filling our kitchen, and now I love creating these Easy Rice Krispie Treats with my own family. They’re not just a dessert; they’re a happy memory waiting to happen. Let’s get cooking!
Why You’ll Love These Rice Krispie Treats
You’re going to adore making these! They’re a guaranteed hit for so many reasons:
- The perfect balance of sweet, gooey, and crispy texture that never disappoints.
- Ready in under an hour, making them a fantastic last-minute dessert.
- A budget-friendly treat that uses simple, pantry-staple ingredients.
- These Classic Rice Krispie Treats are incredibly family-friendly and fun for kids to help make.
- They offer a satisfyingly sweet flavor profile without being overly rich.
- Plus, they’re a no-bake wonder, meaning no oven required!
- You can easily customize these Classic Rice Krispie Treats for any holiday or celebration.
- They’re a simple joy that brings everyone together.
Ingredients for Easy Rice Krispie Treats
Whipping up these Homemade Rice Krispie Treats is a breeze with just a few simple pantry staples. The magic really happens with the combination of crispy rice cereal, sweet marshmallows, and buttery goodness. Here’s what you’ll need for these delightful Rice Krispie Treats:
- 6 cups Rice Krispie cereal – this is the crispy foundation of our treats
- 1 (10oz) bag mini marshmallows – mini marshmallows melt more evenly and quickly
- 4 tablespoons unsalted butter – adds richness and helps bind everything together
- 10 oz green candy melts – for that spooky Halloween base coating
- 3 oz black candy melts – to create the eerie details
- Royal icing eyes – for those perfectly creepy monster faces
- Black jimmies sprinkles – to add a touch of creepy hair to our monsters
How to Make Halloween Rice Krispie Treats
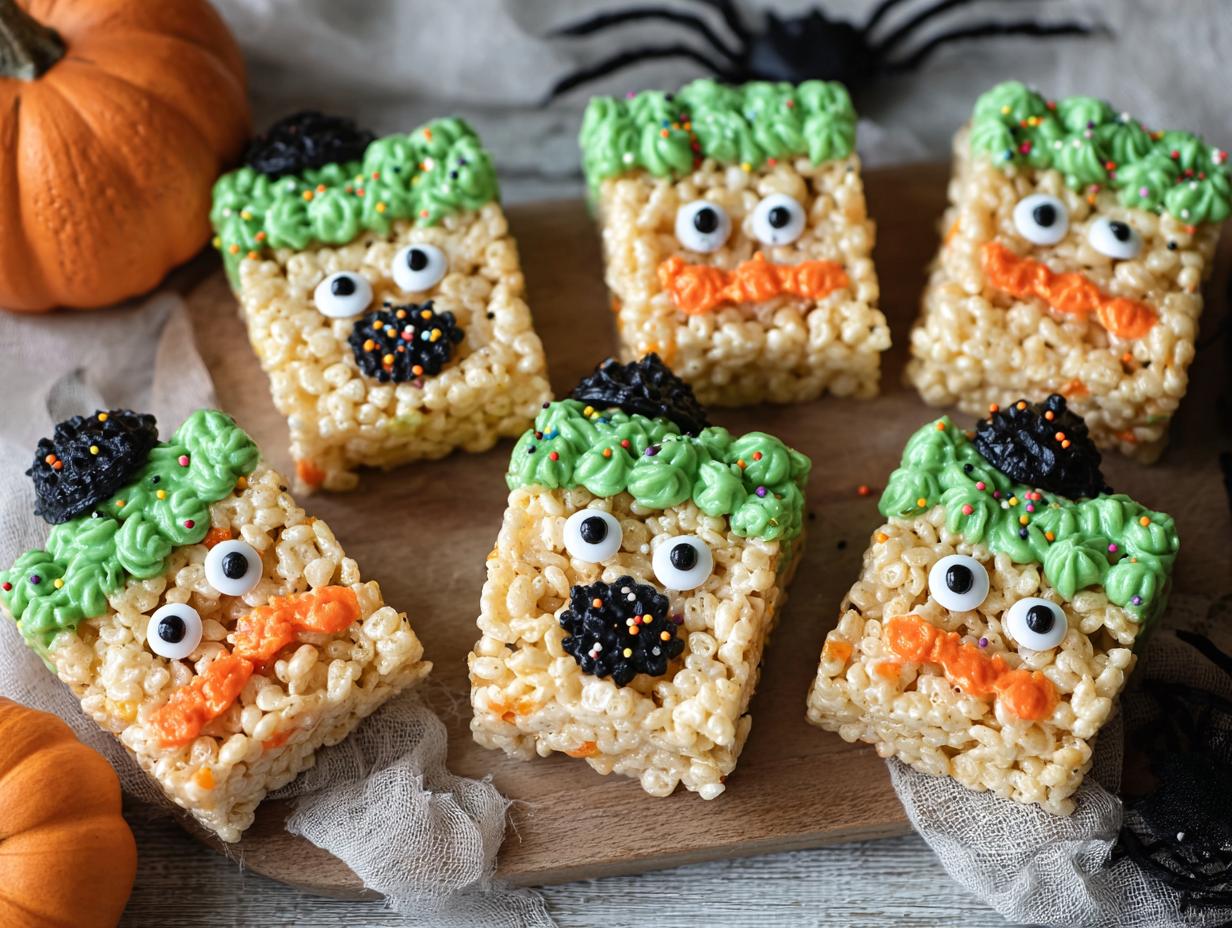
Get ready to create some spooky fun! These Halloween Rice Krispie Treats come together super fast, making them perfect for a last-minute party project. You won’t even need to turn on the oven, as these are wonderfully no-bake Rice Krispie Treats.
- Step 1: First things first, prepare your pan! Butter a 9×13-inch casserole dish or, even easier, line it with parchment paper. This ensures your treats won’t stick.
- Step 2: Grab a large saucepan and melt the 4 tablespoons unsalted butter over medium heat. Once it’s fully melted and shimmering, toss in the 1 (10oz) bag mini marshmallows. Stir constantly until they’re completely melted and the mixture is smooth and gooey.
- Step 3: Take the saucepan off the heat. Now, pour in the 6 cups Rice Krispie cereal. Gently stir until every single crispy piece is coated in that heavenly marshmallow mixture. The sound of the cereal coating is so satisfying!
- Step 4: Transfer this glorious mixture into your prepared dish. Use a spatula or lightly buttered hands to press it down evenly. You want a nice, flat surface for decorating. Let these no-bake Rice Krispie Treats set at room temperature for at least 30 minutes until firm.

- Step 5: Once your base has set, carefully lift it out of the dish using the parchment paper and place it on a cutting board. Cut the entire slab into your desired rectangle shapes.
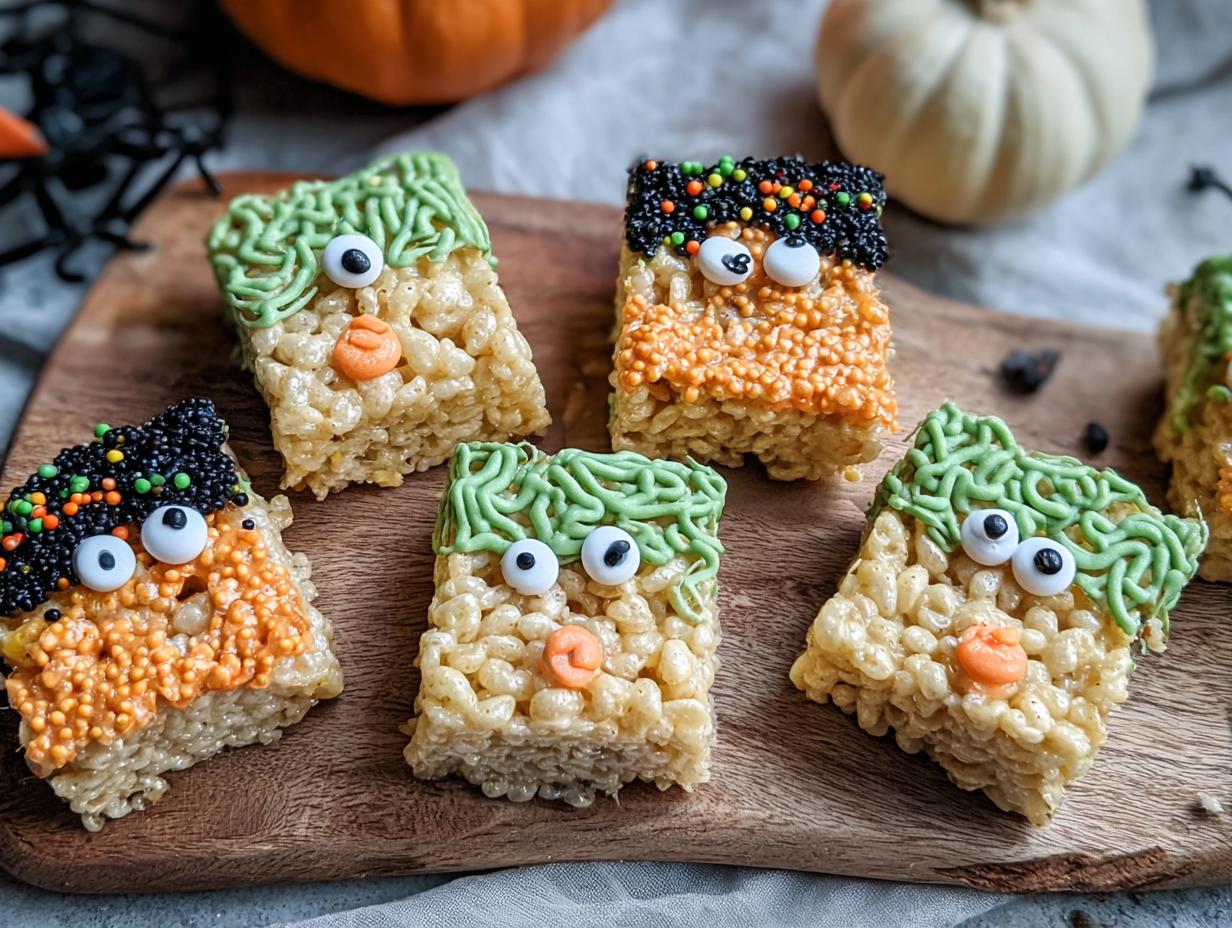
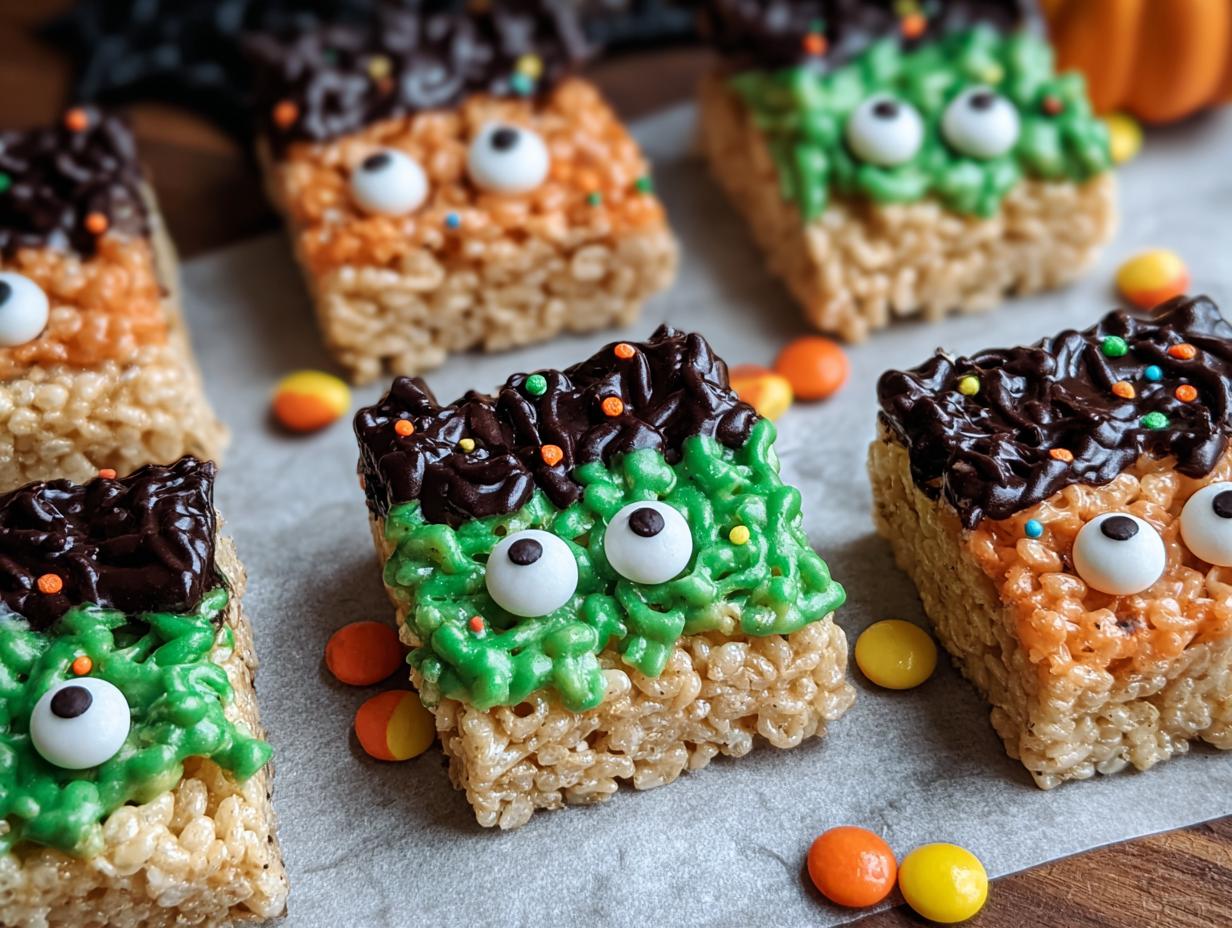
- Step 6: Time for the Halloween magic! Melt the 10 oz green candy melts in a microwave-safe bowl in 30-second intervals, stirring between each, or use a double boiler until smooth. Dip the top third of each rectangle into the melted green candy.
- Step 7: While the green coating is still soft, immediately press black jimmies sprinkles into the wet candy to create creepy hair.
- Step 8: While the green coating is still soft, gently press two royal icing eyes onto each treat to make them look like little monsters.
- Step 9: Melt the 3 oz black candy melts using the same microwave method. Pour the melted black candy into a piping bag with a fine tip. Now, pipe stitches and spooky mouths onto each treat.
- Step 10: Let your decorated Halloween Rice Krispie Treats sit until the candy melts have set completely. This usually takes about 15-20 minutes. Then, they’re ready to be devoured!
Pro Tips for the Best Rice Krispie Treats
Want to elevate your Rice Krispie Treats game? I’ve picked up a few tricks over the years that make all the difference:
- Always use fresh marshmallows. Stale ones can make your treats hard and less gooey.
- Don’t pack the cereal mixture too tightly into the pan. A lighter press leads to a chewier, less dense bar.
- Grease your spatula or hands with butter or cooking spray when pressing the mixture into the pan; it makes it so much easier!
- Work quickly once the cereal is mixed in, as the marshmallow mixture can start to set fast.

What’s the secret to perfect chewy Rice Krispie Treats?
The key to perfectly chewy Rice Krispie Treats is to melt the marshmallows completely and avoid over-pressing the cereal into the pan. This ensures maximum gooeyness and a delightful chew. For more baking tips, check out these tips for baking.
Can I make Rice Krispie Treats ahead of time?
Absolutely! You can prepare the basic Rice Krispie Treats base a day in advance. Let them cool completely, then store them in an airtight container at room temperature. Decorate them the day you plan to serve them for the best appearance. Learn more about making desserts ahead of time with this festive treat recipe.
How do I avoid common mistakes with Rice Krispie Treats?
A common pitfall is using old marshmallows, which leads to hard treats. Another mistake is pressing the mixture too firmly into the pan, making it dense. Always use fresh ingredients and a light touch! For more baking advice, consider this banana pudding cheesecake recipe.
Best Ways to Serve Rice Krispie Treats
These fun Halloween Rice Krispie Treats are fantastic on their own, but they also pair wonderfully with other treats and drinks. Think of them as the star of your dessert table! For a spooky spread, serve these marshmallow cereal bars alongside some Halloween cupcakes or a bowl of festive punch. They’re also great as a fun snack for a movie night, perhaps with a glass of cold milk. You can even cut them into fun shapes using cookie cutters after they’ve set for an extra touch of charm. For more fun dessert ideas, try these chocolate dump cake recipes.
Nutrition Facts for Rice Krispie Treats
When you’re enjoying these festive Halloween Rice Krispie Treats, it’s helpful to know what you’re indulging in. These homemade Rice Krispie Treats are a fun, celebratory snack. Here’s a breakdown of the approximate nutritional information per treat:
- Calories: 180
- Fat: 7g
- Saturated Fat: 4g
- Protein: 2g
- Carbohydrates: 27g
- Fiber: 0g
- Sugar: 18g
- Sodium: 135mg
Nutritional values are estimates and may vary based on the specific brands and quantities of ingredients used, especially with the candy melts and sprinkles. For more information on nutrition, you can refer to resources like the MyFitnessPal website.
How to Store and Reheat Rice Krispie Treats
Properly storing your delicious Rice Krispie Treats is key to keeping them fresh and chewy. Once your decorated Halloween treats have completely cooled, it’s time to think about storage. For the best results, keep them in an airtight container at room temperature. They’ll stay wonderfully fresh for about 3 to 4 days this way. If you need to store them for longer, these crispy rice cereal treats freeze beautifully! Wrap individual treats tightly in plastic wrap, then in foil, and pop them into a freezer-safe bag or container. They can stay frozen for up to 3 months. To reheat, simply let them thaw at room temperature for about 30 minutes, or pop them in a microwave for just 5-10 seconds for a gooey, warm treat. This method works perfectly for both the decorated and undecorated Rice Krispie Treats. For another great make-ahead dessert, try these caramel toffee crunch cake recipes.
Frequently Asked Questions About Rice Krispie Treats
Can I make Rice Krispie Treats without marshmallows?
While most classic recipes rely on marshmallows for that signature gooeyness and binding, you can find variations using other sweeteners like corn syrup or melted caramel. However, for the authentic texture and ease, marshmallows are really the way to go for these delightful crispy rice cereal treats. For a different kind of sweet treat, explore these peanut brittle recipes.
What’s the best cereal for Rice Krispie Treats?
The original Rice Krispies cereal is the standard and gives you that perfect crispy texture. While you can experiment with other puffed rice cereals, they might yield slightly different results in terms of crispiness and flavor. Sticking to the classic is usually best for reliable Rice Krispie Treats.
Why are my Rice Krispie Treats so hard?
Hard Rice Krispie Treats usually happen for a couple of reasons. Either your marshmallows weren’t fully melted and smooth, or you might have pressed the mixture into the pan too firmly. Using fresh marshmallows is also crucial; older ones can make the treats tough. For tips on achieving the perfect texture, consider this Reese’s Peanut Butter Banana Bread recipe.
Can I add mix-ins to my Rice Krispie Treats?
Absolutely! Adding mix-ins is a fantastic way to create unique Rice Krispie Treat variations. Chocolate chips, M&Ms, sprinkles, or even a swirl of peanut butter can be stirred in just before pressing the mixture into the pan. Just be sure they’re added when the mixture is still warm so they incorporate well.
Variations of Rice Krispie Treats You Can Try
Once you’ve mastered the basic recipe, the possibilities for Rice Krispie Treats are endless! These delightful marshmallow cereal bars are incredibly versatile. You can create gluten-free versions by simply swapping the cereal for a gluten-free puffed rice option. For a richer flavor, try adding a swirl of peanut butter or melting in some chocolate chips when you stir in the cereal. These easy Rice Krispie Treats also lend themselves well to different decorating techniques, allowing for creative Rice Krispie treat variations for any occasion. For more creative baking, check out these cheesecake pizza ideas.
Print
Perfect Rice Krispie Treats: 10 Chewy Bites
- Total Time: 55 minutes
- Yield: 12-16 treats 1x
- Diet: Vegetarian
Description
These Halloween Rice Krispie Treats are spooky, fun, and delicious! Made with marshmallows, crispy cereal, and decorated with candy melts, sprinkles, and icing eyes, they’re perfect for Halloween parties or a festive family treat.
Ingredients
- 6 cups Rice Krispie cereal
- 1 (10oz) bag mini marshmallows
- 4 tablespoons unsalted butter
- 10 oz green candy melts
- 3 oz black candy melts
- Royal icing eyes
- Black jimmies sprinkles
Instructions
- Butter a 9×13-inch casserole dish or line with parchment paper.
- In a saucepan, melt the butter over medium heat. Add the mini marshmallows and stir until completely melted and smooth.
- Remove the saucepan from the heat and stir in the Rice Krispie cereal until evenly coated.
- Transfer the mixture into the prepared dish. Use a spatula or buttered hands to press the mixture evenly into the dish, ensuring the top is flat. Let the treats set at room temperature for at least 30 minutes.
- Once the base has set, remove it from the dish and place it on a cutting board. Cut the slab into rectangles.
- Melt the green candy melts in a microwave-safe bowl or over a double boiler until smooth.
- Dip the top third of each rectangle into the melted green candy. Immediately press black jimmies sprinkles into the wet coating to create hair.
- While the green coating is still soft, add two royal icing eyes to each treat.
- Melt the black candy melts in the microwave in short intervals, stirring between each. Pour into a piping bag and pipe stitches and mouths onto each treat.
- Allow the decorated treats to set completely before serving or storing.
Notes
- Use fresh marshmallows for the best texture.
- Grease your spatula or hands to easily press the mixture into the pan.
- Work quickly when decorating as candy melts set fast.
- Store in an airtight container at room temperature for up to 3 days.
- Prep Time: 15 minutes
- Cook Time: 10 minutes
- Category: Dessert, Snack
- Method: No-Bake
- Cuisine: American
Nutrition
- Serving Size: 1 treat

